 30 minutes | Tools
Aims: to learn how to edit an audio file in order to improve its sound quality and remove mistakes. In this practice sheet we will see how to use the free software Audacity to edit, clean and export a voice recording.
Key words: Audio, Recording, Software, Audacity.
Prior knowledge: You can download Audacity for Linux, Windows and MacOS directly from the official website.
Alternatively, if you cannot install any software, you can use an online tool as Audiomass or Sodaphonic to edit your audio file (and even directly record your voice) from your web browser.
Import a recording
If you recorded your voice directly into Audacity (see Practice Sheet 1), you can skip this step and go directly to the Editing part.
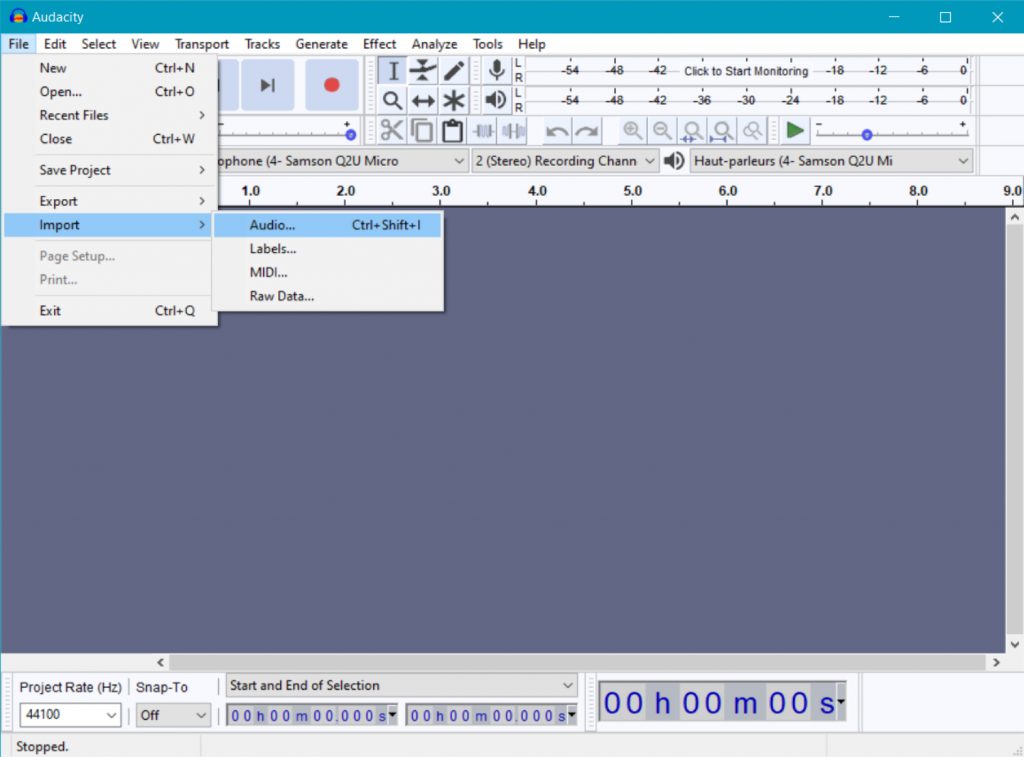
To import an audio file in Audacity, go to File > Import > Audio file.
Editing a recording
It might be useful to edit your audio file to remove mistakes, breathing sounds, or add silences for a better narration. We recommend to make silences between important parts to have a more natural flow.
The Play Button ![]() or Space bar, allows listening to the audio file imported. Click on the timeline to change the position of the reading head. Timecodes are indicated at the top of the audio waveform, and can be zoomed in or out with CMD/CTRL + Mousewheel, or with the zoom
or Space bar, allows listening to the audio file imported. Click on the timeline to change the position of the reading head. Timecodes are indicated at the top of the audio waveform, and can be zoomed in or out with CMD/CTRL + Mousewheel, or with the zoom ![]() buttons.
buttons.
Remove and move parts
You could want to remove trials and errors, when you started a sentence but stopped in the middle of it, of just want to get rid off something. Note that to make a deletion or a displacement feel natural, you need to take into account the sound after and before the part you remove: sudden drops of sound volume, tones switching or speech rate may be distracting. Don’t edit too tightly!
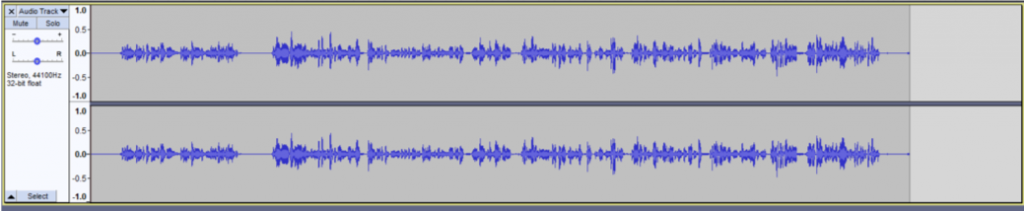
When you have an audio track opened in Audacity, you can see the waveform of this audio. A high peak is where the volume is high, while low waveform is silence and breaks. This way, you can detect where a cut is possible and where variations are too important for being touched without being noticed.
To delete a part, pick the selection tool,![]() click at the beginning of the part you want to remove, drag your mouse till the end of the part, and release your mouse button. Then, use Del key.
click at the beginning of the part you want to remove, drag your mouse till the end of the part, and release your mouse button. Then, use Del key.
To move a part, once it’s selected, you can cut it (CTRL/CMD + X or Edit > Cut), then click on the waveform where you want to add it, and paste it (CTRL/CMD + V or Edit > Paste).
Add silences
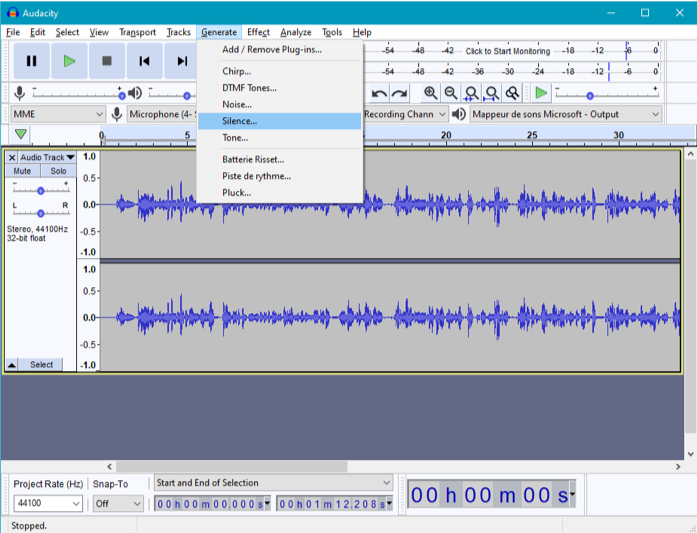
To add a silence, click on the waveform where you want to insert it. Then, menu Generate > Silence, and select the duration in seconds.

Audio processing
Audio processing can improve the quality of the audio file by modifying the volume or by removing background noises.
Processing presented here are done with “effects” found in the Effect menu. They can be applied to the whole audio file or just a part. You always need to select on the waveform the area you want to modify.
Modify volume
To decrease or increase the volume, select Effect > Amplify.
A positive value will increase the volume, while a negative value will decrease it.
Once the effect applied, the waveform is modified accordingly to the value selected.
Noise reduction
Often, the audio recording contains noise and parasites we can mitigate with noise reduction:
- Select a short moment on your audio track with only background noises, maybe at the beginning or the end of the recording, without voice.
- Select Effect > Noise reduction > Click on Get Noise Profile. Audacity analyzes the audio part your selected to create a profile we will now apply to the audio track.
- Select all (or a part) of your track you want to process.
- Select again Effect > Noise Reduction > and directly click OK, as the settings were defined by the previous step.

Export
Your audio file is edited and you want to export it.
For archiving and editing again your audio file later, export it to WAV as it is a high quality format.
For web use and sharing, export it to MP3 as it is lightweight and standard on digital platforms.
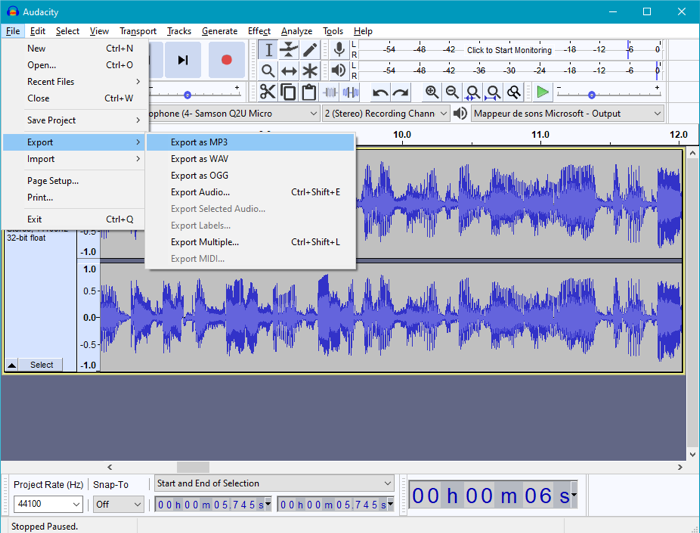
To create save your audio file, go to File > Export > Export as MP3 (or Export as WAV).
In the Save window, select your export folder, choose a name for your audio file. Before pressing save, select the following settings:
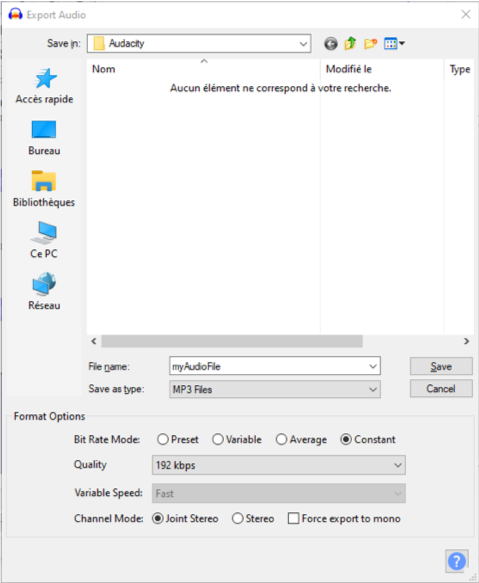
Bit rate mode: Constant
Quality: 192 kbps
Channel mode: check Force export to mono.